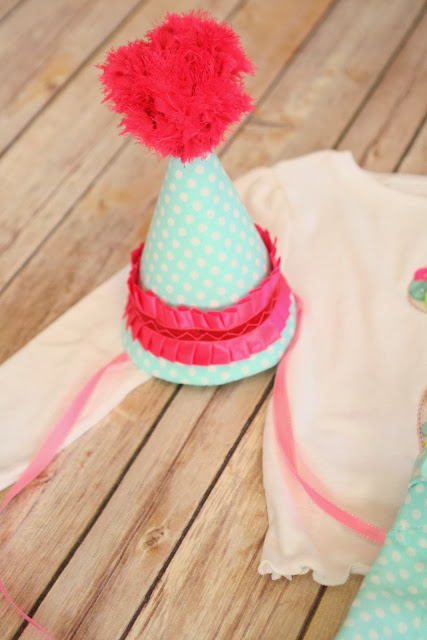
I planned to post the tutorial after my daughter's birthday party but this hat is just too cute to keep to myself!

Here's the step by step on how you can create a fabric party hat!
First, download the template that I created here!
The instructions and template were designed for my first DIY party hat but after making this one I think I'll be using the following technique for all my hats! (Original post <----no sew party hat!)

Step 1: Print and cut out the pattern and pin to your fabric. You will need to cut 2. In this picture I folded over my fabric with right sides together, pinned the pattern, and then cut around. You'll want to cut 3/8" away from the edge of the pattern to give yourself a seam allowance!

Step 2:
Iron interfacing to the back of one piece. I used a medium weight iron on cutaway stabilizer but I think a heavy weight would be the best!

Step 3: Mark on one of the pattern pieces where you will want to pin your ribbon. I would guesstimate that I marked 3 inches away from the edges.

Step 4: Arrange your ribbon on the right side of the fabric like pictured and pin in place. You will be replacing these pins once you sandwich the other piece on top.

Step 5: Place the other piece on top so right sides of fabric are together. Replace the pins that are holding the ribbon and pin the rest of the way around. Leave a 2 inch opening and move the ribbon to that hole so you don't accidentally sew over the ribbon!

Step 6: Sew all around the hat - back stitch at the beginning and end of where your 2 inch opening will be.

Step 8 - Turn right side out and press with a hot iron (You could also top stitch all around the edge)

Optional steps: Add trim!!! I used some cute pleated ribbon around the bottom of the hat (pinned in place and then hot glued)
It's the perfect party accessory to Eva Mae's 2nd birthday outfit!!! Her t-shirt has an embroidered 2 and then I hand sewed buttons to fill the center of the embroidery (it is designed to be an applique but I didn't use any fabric on the shirt....just buttons!) The pants are the Whitney Pants by Violette Field Threads! I can't wait to take pictures for her birthday! She's a big girl now!


Thank you!!!!! Super cute!!!!
ReplyDeleteThe whole outfit is adorable! I have some of that chiffon trim, but I never thought to use it that way. How clever!
ReplyDeletethank you...
ReplyDeleteit's wonderful. nice tutorial :)
jilbab
The outfit is gorgeous :)
ReplyDeleteThat's so sweet of you thanks for sharing the pattern I'll look forward to make some for my daughter upcoming b-day, It's lovely, specially the outfit, indeed you have a nice sewing skills, I like what you've did with the t-shirt specially the embroidered 2 it do stands out.
ReplyDeleteThese are so adorable!!!
ReplyDeleteHow much fabric was used to make the hat?
ReplyDelete