
Easy Birthday Dress
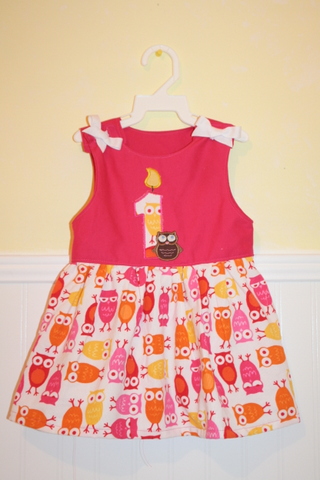
I wish I had taken pictures throughout the process but this is a really easy dress that has a lot of similar tutorials out there!!! Here is a step by step on how I made it:
Step 1: Cut out the bodice - I traced a t-shirt to get the shape for the neck and arm holes and then added some length in the shoulders for the fold over flap closure. Also, I added about 1/2 seam allowance to all the sides. You'll need to cut a front and back of the main fabric and a front and back for the lining. I used the same fabric for the lining and dress.
Step 2: Sew side seams of the front and back on the main fabric and the lining fabric. Press seams open
Step 3: Embroider or add any embellishments to the front on this step. I wanted to embroider the "1" for her first birthday but I wanted the stabilizer to be on this inside of the dress instead of visible on the lining.
Step 4: Place the lining and the main fabric right sides together and sew all along the neck, back, shoulders and arm holes. Turn right side out from the bottom edge that wasn't sewn. Press and topstitch around the neck and arms.
Step 5: Cut out a rectangle for the skirt - My measurements were 20" waist so I have a 40" by 10" rectangle. (8" is the typical size for 18 month waist to knee skirt)
Step 6: Hem the bottom of the skirt and add a gathering stitch to the top
Step 7: Gather the skirt and pin to the bodice - right sides together. Sew all around to attach the skirt to the bodice.
Step 8 (optional) serge the seam and top stitch around the waist
Step 9: Add 2 small button holes to the front shoulder and sew a 10-15" ribbon to the back shoulder to thread through the button hole and tie. Or, you could sew buttons to the shoulder. I like the cute little bows on the shoulder!


So cute!! -Marci
ReplyDeleteShe'll have a wonderful birthday I'm sure. I hope to make this soon. From a fellow sewing Mama!
ReplyDelete