Pages

header2

Image Map

adsense

Tuesday, December 18, 2012

ABC's of LOVE - K

In the wake of Friday's horrendous tragedy I have joined several other bloggers to spread JOY and HOPE through 26 random acts of KINDNESS - just as there are 26 letters in the alphabet and 26 new angels in heaven, we can choose to show love in 26 creative ways.  Our hearts and prayers are with all of the families.  Like so many others, I have no words.  I have cried, hugged my own children even tighter and prayed for all those that are dealing with grief.  Those precious children and heroic women - I pray that the Lord will be with their families.

My letter is K - Kiss each family member an extra time each day - 


It's not hard to lose count of kisses - especially in an affectionate home!  I couldn't tell you how many hundreds I give my kids a day!!!  You can bet that I'll always be ready to kiss each one an extra time!  I read an interesting quote the other day and wanted to share it with you:
What a great reminder of how important physical touch is to the development of our children!

Let's all choose to give a few more "xoxo" to our loved ones!

Here are some ideas:
1.  Use a fabric marker to simply draw "xoxo" on the inside of your child's long sleeve shirt or sweatshirt!!!  They won't have to worry about someone at school teasing them, but they can easily "sneak a peek" to be reminded of their mother's love!

2.  Use decorative embroidery thread to add an "xoxo" design at the bottom of a dress for your daughter!

3.  Leave a post-it note with "xoxo" in the pocket of your husband's favorite jacket!

4.  When you get out of the shower, draw "xoxo" in the steamed mirror and the next time someone washes up, they will see the message reappear!

Please take a few minutes and visit these other participating bloggers and share with us how you choose to be a light to your family and those that surround you! <3

250px button
Photobucket
Photobucket
Sewing Mama RaeAnna
 sewastraightline


Be the good!

Saturday, December 15, 2012

Boutique Bow Tutorial


If you are visiting from sewVery, welcome!!!  I'm excited to offer this tutorial to you!!

BOUTIQUE BOW TUTORIAL
Materials:
approximately 28" of 1"-1.25" ribbon for base
approximately 20" of ribbon for second layer
needle and thread
hot glue gun
alligator clip
optional:

5" of 1/4" ribbon for knot center
3" of 1/4" ribbon to cover alligator clip
feltie character

Folding ribbon into the boutique bow has always been a struggle for me!  There are tons of youtube videos and tutorials out there and I think I've watched them all!!!  This tutorial combines several different techniques that I've seen posted and is the best method for me.  You may find other tutorials for folding that you may like better!  Feel free to comment with links so others that read this post can learn more!

 
First, take your ribbon and measure 2" from the end.  Mark with a water soluble marker.  Then, add 4 more markings - each about 5 3/4-6" apart.
 
After the fourth line, mark another 2" on the end and trim. (you can see my "oopsie" measurement - ignore that!  We all make mistakes even when we're creating a tutorial!)

 
Thread your needle (I used black to show up in pictures but you'll want to match your thread to your ribbon!) and begin to sew up the line that you marked.  This will be to gather the ribbon in the last step!


You'll continue to add a line of stitches while folding the ribbon over each time.  If you're using a ribbon that has a pattern on one side make sure the pattern is always facing out in the folds. 
 
This is what your ribbon will look like when you are ready to gather it into the bow!

 
Gently pull the string and wrap it around the middle several times to secure it in a bow shape.  Tie off the thread so it doesn't unravel.

 
There are techniques to finish the bow ends.  You can use your scissors to cut a "V" shape in the end or cut at an angle.  I use a lighter to melt the end of the grosgrain ribbon so it doesn't fray.  You could also use "fray check" to keep the end from fraying.
Dritz 88081 Fray Check with Fabric Guide Applicator Tip (Google Affiliate Ad)


Now, let's make the 2nd layer ribbon!  You could use the same technique as above but I like a little variety with the bow!
Take your ribbon and mark the center line by creasing with your finger.

 
Fold in each end of the ribbon to the middle (I had to use something heavy to keep the ends in place for the picture - don't cut anything!!!)

 
Using your needle and thread again, sew a gathering line in the middle and tie it off like you did the other bow.  Make sure all the layers of the ribbon are secured in the thread.


You can hot glue the top ribbon to the bottom ribbon now, or you can use a 1/4" ribbon to create a middle section of your bow.  You can also use a 3" piece to cover your alligator clip!
 
I tied a little knot in the center of a 5" strip of ribbon and hot glued it closed in the back.  Then, I hot glued the 3" strip to the top and top inside of the alligator clip.
 
Hot glue the alligator clip to the back.

 
Now, you can add a feltie character to the center of the bow or leave as it is!
If you have an embroidery machine, felties are super easy to stitch out!  The tutorial that I like the best is here: http://www.studiomcadesigns.com/2012/08/01/feltie-tutorial/
If you don't have an embroidery machine you can buy already made felties on etsy!  Or, you have the chance to WIN 4 felties by entering the sewVery rafflecopter giveaway!  To celebrate Veronica's first guest post I will give 2 owl and 2 heart felties!  Enter here

I made a ton of bows as gifts for my daughter's one year birthday party!!!  

Bows are a great stocking stuffer and party gift!  Thank you so much for reading and I hope the links that I learned from will help you on your way to making boutique bows!

If you're visiting from sewVery's page, thank you so much for stopping by!  We've made a special giveaway for you here:


Check out Veronica's post about embroidery HERE
and our playdate post HERE


Wednesday, December 12, 2012

Eva Mae's Birthday Party


I can't believe my baby girl is 1!!
She has brought so much joy into our lives and she's been the inspiration behind most of my sewing!!!

I love sewing for my boy but having a girl (and finally being able to be a stay at home mommy) really turned up the notch on my crafting!

I hope you enjoy these pictures! 


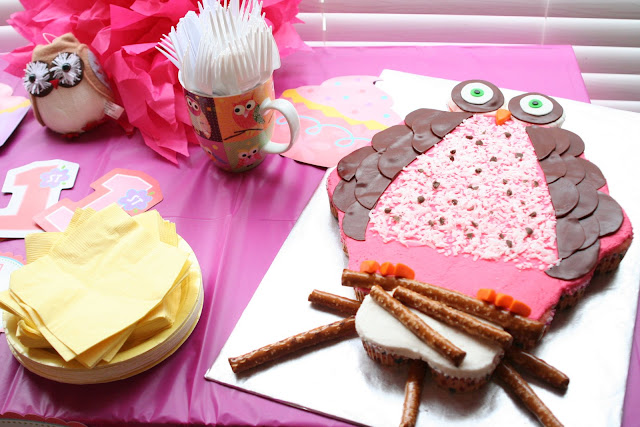
The SMASH cake!!! I wish I could take credit - the cake and the cupcake owl below were done by my friend, Amazing Cakes by Christina


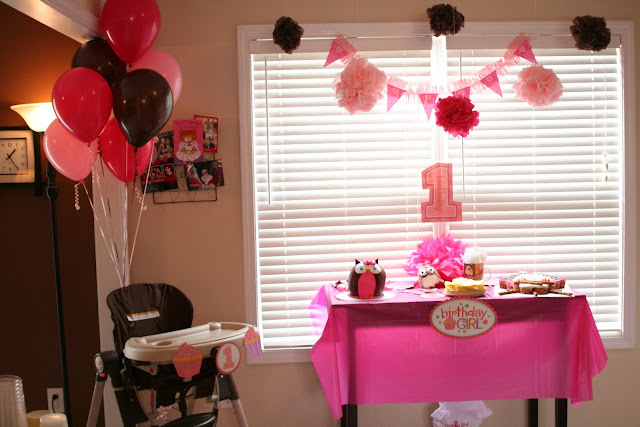
Thank you, Pinterest, for your tissue pom tutorials!!!


This was my inspired platter!  There were some cute cheese owl platters on Pinterest but I needed a veggie tray!  I think he turned out cute! :)


I used some cute paper cut outs from a party pack to add decoration around the room!  I love the pink and brown color scheme!!  It's time to start pinning ideas for birthday #2!


I made these bows to give away as favors to the other little girls at her party!

 
How cute are these babies?!  The other two turn 1 on Saturday!  We'll be party hopping all day!


Here's a good picture of Eva Mae's outfit!

And her bloomers!


BONUS......
So I had originally made this dress for her to wear but decided on the tutu and t-shirt - so she wore the dress on her actual birthDAY and got to have a cupcake! :)  Happy birthday little girl!!!  You make mama so happy!


Monday, December 3, 2012

Tis the season to be busy!


Welcome to December!!!!  It seems like this month is always so crazy!  I purposed this month that every day we would do something fun and "Christmasy" as a family!  Even if it's just watching a Christmas movie!  Otherwise, the days seem like they fly by through the month and my favorite time of year is over!


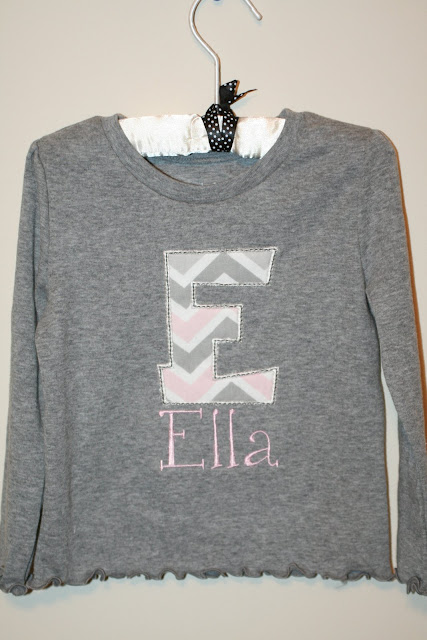
Gifting is probably my favorite part of the Holidays!  I love making things and figuring out gifts for the family! This Ella shirt is for a girl in MOPS who had her daughter "model" an outfit that I made for another friend!  I told her I would thank her by making a shirt with her name!  I love the chevron!

And I'm super excited about this monogram sweatshirt!  I was randomly contacted by someone who Google searched "monogrammed sweatshirts" and saw my post as #6 in the Google search result!  Wow!  I feel like I've made it to the big times! :)  This is for his daughter for Christmas!  I sent it off today!


My littles enjoyed their matching Gingerbread outfits!!!  I finished them on my birthday and they wore them over to Mimi and PopPop's for the Christmas parade!
 

I love how they came together!  I made a previous shirt for Eva Mae with the ginger girl but the fabric was too dark of a brown.  I love how the cookies look in this shade!


I think this set is one of my favorites that I've done!!!  I made these for my niece and nephews in Idaho as part of their Christmas gifts!  The leg warmers were a Pick Your Plum deal and I bought several others for Eva Mae!  I need to make her a Christmas onesie too! 


I absolutely love the Blanks Boutique Pajamas!!!  We put these pictures on our Christmas cards and I couldn't be happier with how adorable my children are!!!  Am I biased?  Just a bit!!!!  The setting for our pictures was perfect!  We took a little vacation to a State Park for Thanksgiving and did all our family pics!


I laughed when I saw this picture - Eva Mae is trying to put a rock in her mouth - I have no idea what Christian is doing!


This spot was so breathtaking!  We were walking through the State Park and I made Christian and Nick pose for some pictures with those beautiful trees and gorgeous lighting!!!  


Making memories with the family is such a blessing!  My dad snapped this shot of me and my mom as we worked on our Christmas cards in the hotel room over Thanksgiving!  Gotta love my double chin! haha!!!

Thanks so much for reading and checking out my pics!  What is keeping you busy this month?

Stay tuned for a fun gift reveal with some blogging friends of mine!  We did a little Secret Santa gift exchange and I can't wait to post the pictures of my project!!!

LinkWithin

Related Posts Plugin for WordPress, Blogger...