KCWC Day 3 and PR&P Holiday Wear!!!

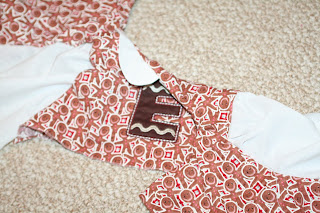
(Fabric: Michael Miller 100 Calorie Snack Pack - Applique: Gingerbread Alpha from Planet Applique)
So I thought I would try to kill two birds with one stone this week and finish a Holiday wear look! I LOVE how this dress turned out!!! She is so stinkin' adorable!!!
Here's the tutorial of how I created the look!
I took measurements of a bodice pattern and drew up my own (I didn't want the neckline that was on the pattern so the neckline was the only thing I really changed.)
I traced the peter pan collar from a Simplicity pattern and ironed interfacing to one side
The pattern I modified had short sleeves so I added length to make it long sleeved.
You'll also need a long rectangle to make the skirt - double the width of the waist and cut about 10" if you're making the skirt to a 18mo-2T size.
Here's what your bodice pieces will look like:

Add the lining bodice to the front bodice right sides together and sew the arm seam only so that you're encasing the sleeve. That way you won't have a raw edge on the inside of the dress at the arm hole.

NOW, this is tricky. You are going to sew the neck and back together but it's going to look really funky like this:

Don't worry, it will all turn out in the end!!! Make sure to pin it in place though. Sew up the side seam, curve of the neck and down the other side seam. Leave the bottom open.
I didn't take pictures of the rest of the steps but it's easy to put together after this.
Sew the sleeves closed by putting them right sides together. You can finish with a serger or zig zag stitch. Hem the sleeve.
Sew the side seam of your long rectangle for the skirt. Gather and pin to the bottom of the bodice. Finish the seam with a serger or zig zag stitch and top stitch the bottom of the bodice. Hem the bottom of the skirt.
Add buttons to the back and you're done!!!


Beautiful dress and beautiful baby!
ReplyDeleteSo cute! Love that print, chic holiday is tough to find! Happy I stumbled upon you via the Train to Crazy, I'm in the Nashville area as well (Bellevue)!
ReplyDeleteThis dress is awesome!!!!!!!!!!!!Thanks for sharing!!!!!!!
ReplyDeletewww.blissfulsewing.blogspot.com
So cute, but did I miss the pattern?
ReplyDeleteI used existing patterns on hand - you can use any sort of bodice pattern that you like to re-create the look! There's a free bodice pattern at the blog "Climbing the Willow" :)
DeleteThat looks amazing! Thanks this simple step to step sewing tutorial! I am a working mother, associated with academic platforms to provide Law assignment help in UK. It always get complicated to manage my work and home. I was looking for sewing tutorials for my daughter's holiday look and got this easiest guide. I hope it will help me to sew!
ReplyDelete